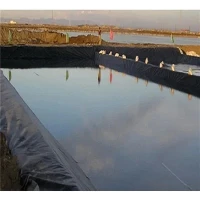
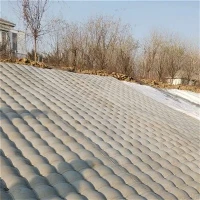
Nonwoven geotextiles are versatile synthetic fabrics made from randomly oriented fibers (typically polypropylene or polyester) that are mechanically, thermally, or chemically bonded. They are essential materials in civil engineering, environmental projects, and construction due to their excellent functions in separation, filtration, drainage, and protection. The success of any project using nonwoven geotextiles is heavily dependent on proper installation techniques. This article outlines the key steps and best practices for their correct construction.
1. Pre-Installation Preparation
a. Site Inspection and Clearing:
Before any geotextile is unrolled, the site must be thoroughly prepared. This includes clearing the area of all vegetation, rocks, stumps, sharp objects, and any other debris that could puncture or damage the fabric. The subgrade should be graded to the designed lines and levels and compacted as required. The goal is to create a smooth, stable, and uniform surface.
b. Material Handling and Storage:
Geotextile rolls must be handled with care to avoid damage. Use lifting equipment (like fabric slings or spreader bars) instead of hooks or chains, which can tear the material. Rolls should be stored on a flat, dry surface off the ground and covered with a tarpaulin to protect them from UV degradation, moisture, and dirt before installation.
c. Verification:
Verify that the delivered geotextile meets the project specifications, including weight, strength, and permeability properties. Check the roll tags for manufacturer details and product type.
2. Installation Process
a. Unrolling the Geotextile:
Place the roll at one end of the prepared area. Unroll the geotextile manually or with mechanical equipment, ensuring the correct side (if applicable) is facing up. The geotextile should be laid flat against the subgrade without wrinkles, but also without excessive tension.
b. Orientation and Overlap:
Lay the geotextile in the direction that offers the least number of seams, typically parallel to the centerline of the project (e.g., a road or ditch). Adjacent rolls must be overlapped to ensure continuity and prevent soil from passing through the seams.
Standard Overlap: A typical seam overlap is 300 mm to 600 mm (12 to 24 inches).
Variable Conditions: In wet or soft subgrade conditions, the overlap should be increased to 900 mm to 1.5 meters (3 to 5 feet) to account for potential shifting.
Anchoring: On slopes, start the installation from the bottom and move upwards. The upper panels should overlap the lower ones, like shingles on a roof, to prevent water from getting underneath. Temporary anchoring with staples or sandbags may be necessary on steep slopes or in windy conditions.
c. Seaming (if required):
For critical applications where minimal seam movement is essential, overlapping might not be sufficient. In such cases, seaming methods can be employed:
Mechanical Sewing: Using a heavy-duty sewing machine to stitch panels together.
Bonding: Using adhesives or thermal welding to fuse panels.
d. Placement of Fill Material:
This is a critical step to avoid damaging the geotextile.
Initial Lift: The first layer of backfill material should be placed carefully from a low height. Use a lightweight, granular soil or sand if possible.
Spreading: Spread the material by dozing from the placed pile onto the geotextile. Avoid directly tracking or turning equipment on the exposed fabric. Never drop fill material from a great height.
Compaction: Initial compaction should be done with light equipment. Once a sufficient cover of fill material (typically 150-300 mm or 6-12 inches) is in place, heavier compaction equipment can be used.
3. Post-Installation and Inspection
Continuously inspect the installation process to ensure the geotextile has not been torn, punctured, or excessively stretched. Any damaged sections must be immediately repaired by placing a patch of new geotextile over the damaged area, extending at least 0.5 meters beyond the damaged section on all sides, and securing it.
Key Considerations for Different Applications
Separation (e.g., in unpaved roads): The primary goal is to prevent the mixing of subgrade and aggregate. Ensure a smooth subgrade and adequate overlap to maintain a continuous barrier.
Drainage/Filtration (e.g., behind retaining walls, in French drains): The geotextile must remain in intimate contact with the soil to prevent clogging. Carefully backfill against the fabric to avoid stretching it away from the soil.
Protection (e.g., of geomembranes in landfills): The geotextile acts as a cushion. Ensure it is smooth and wrinkle-free to prevent point stresses on the liner below.
Conclusion
Proper installation of nonwoven geotextile is not complex, but it requires careful attention to detail. By meticulously preparing the site, handling the material correctly, ensuring adequate overlaps, and placing the initial fill with care, engineers and contractors can guarantee that the geotextile performs its intended functions effectively, thereby enhancing the longevity, stability, and performance of the entire structure.